The Road to Physicals
We spent ages modelling the bunny to get him right for printing, then a long time perfecting struts and finishing techniques.
We knew the bunnies should come to life in both digital and physical forms. 3D printing seemed like an obvious choice. Would we have started this journey had we known the time and effort it was going to require? Well thats an interesting question.
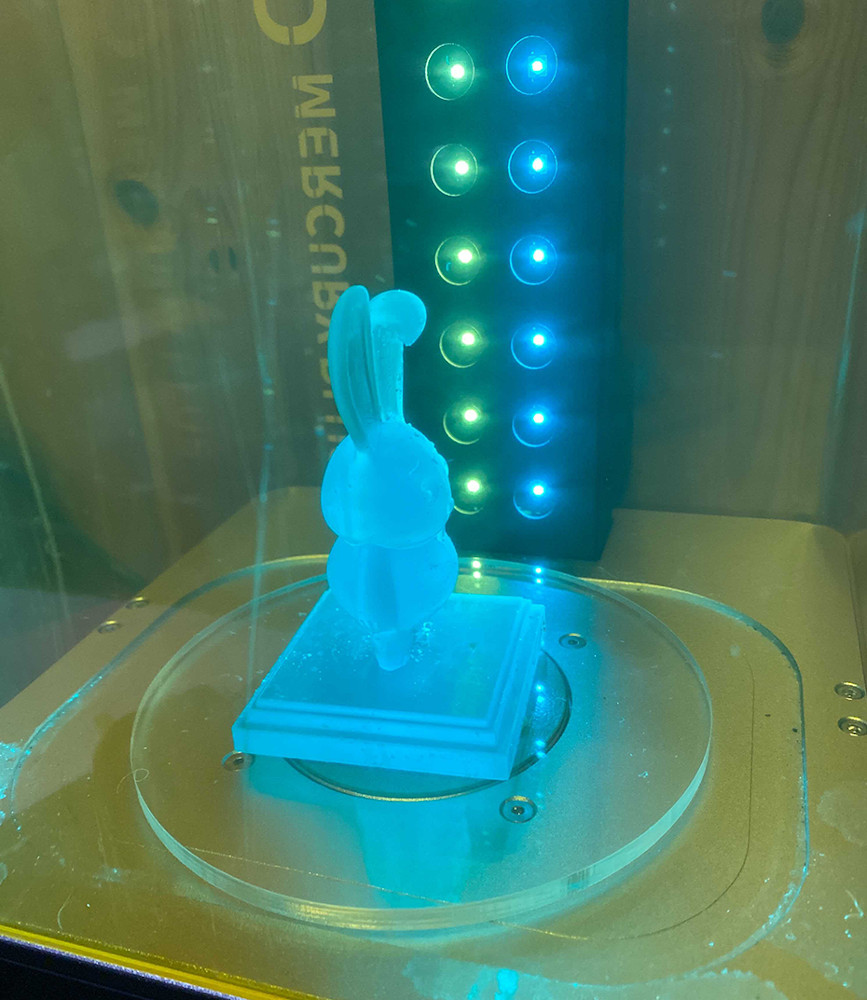
Teaming up with super geek Matt Rayner we set about planning the process. Thankfully we had a little bit of 3D printing experience under our belts. The first choice was what printing medium we should use. For those familiar with 3D printing you will know there is a host of different resins that can be used for the task. We settled on a type that would produce both grey standard finishes for painting but also a translucent version for added flex.
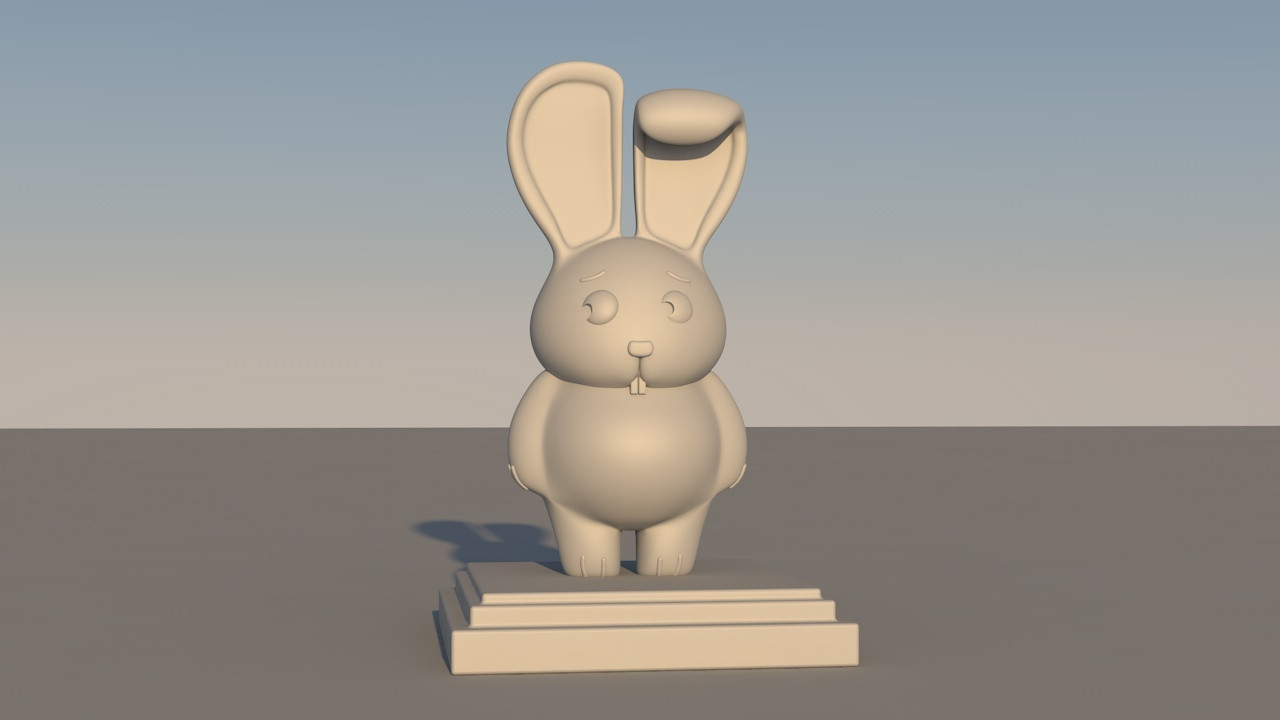
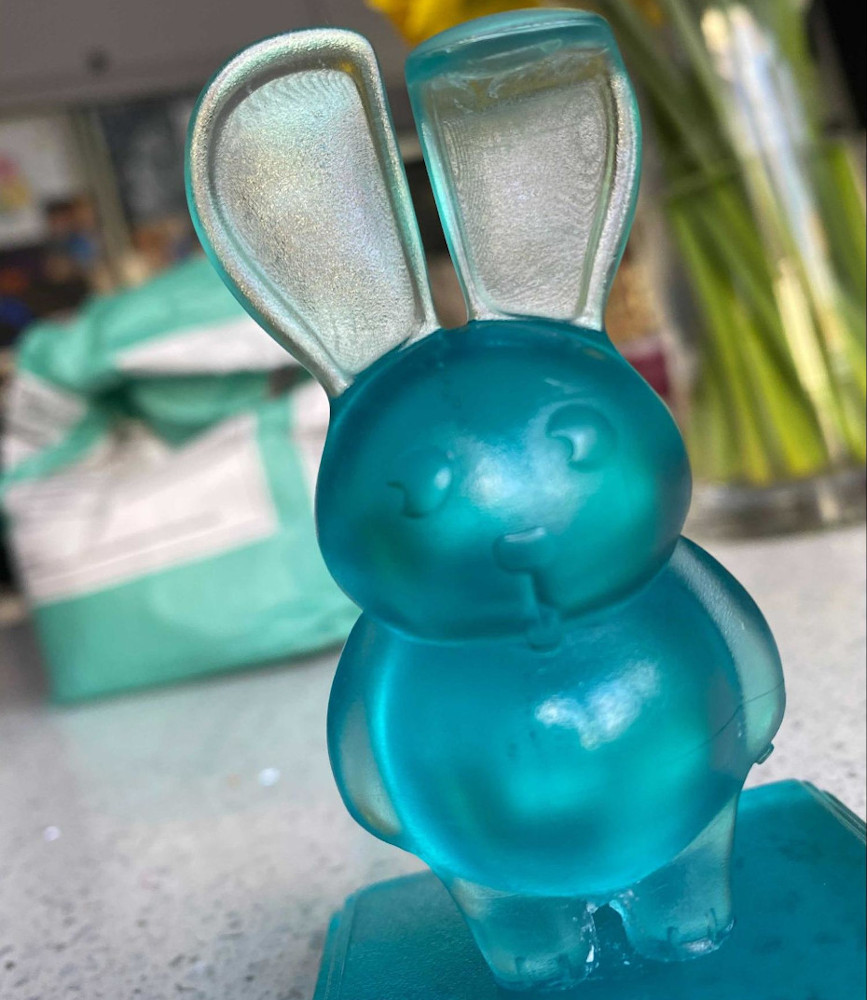
While we waited for the resin to arrive we started to look at modelling the bunny in 3D. While there had been the odd 3D Rarebit collab we never had an idea of how his body really looked from behind, nor how thick the ears were. Once these proportions were dialled in we heavily sub-divided the model to ensure nice smooth surfaces (lower poly count will result in tiny lines in the surface requiring filling and sanding; not ideal in transparent prints).
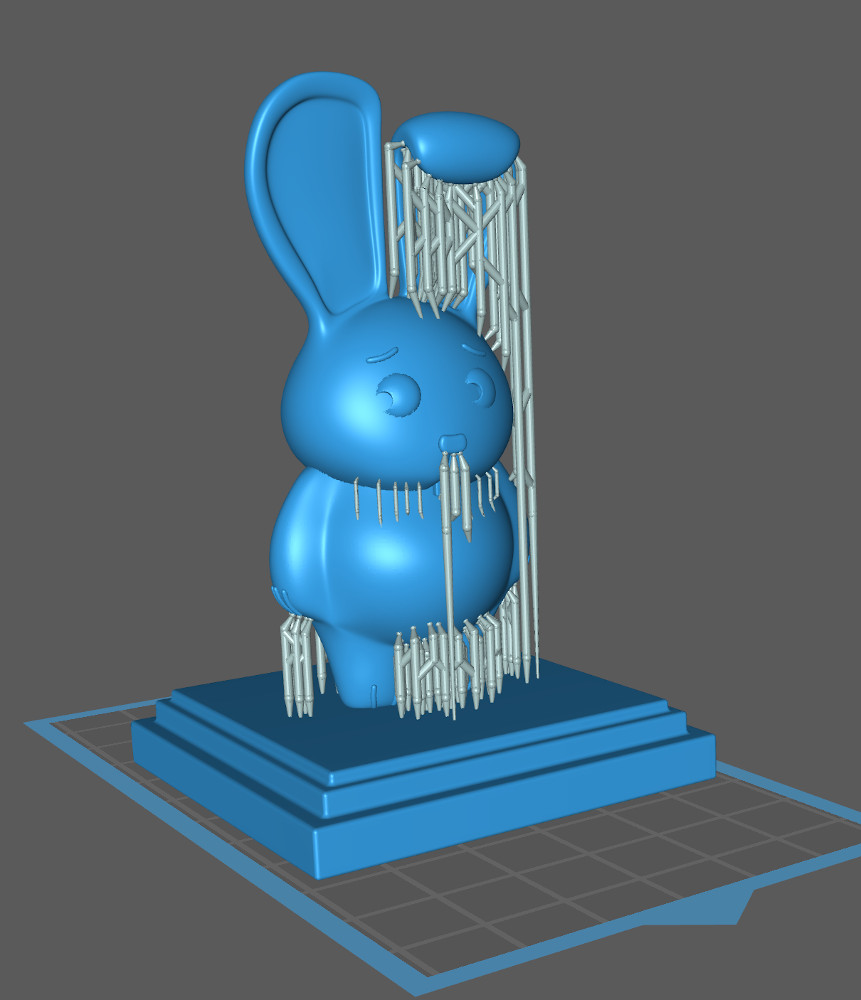
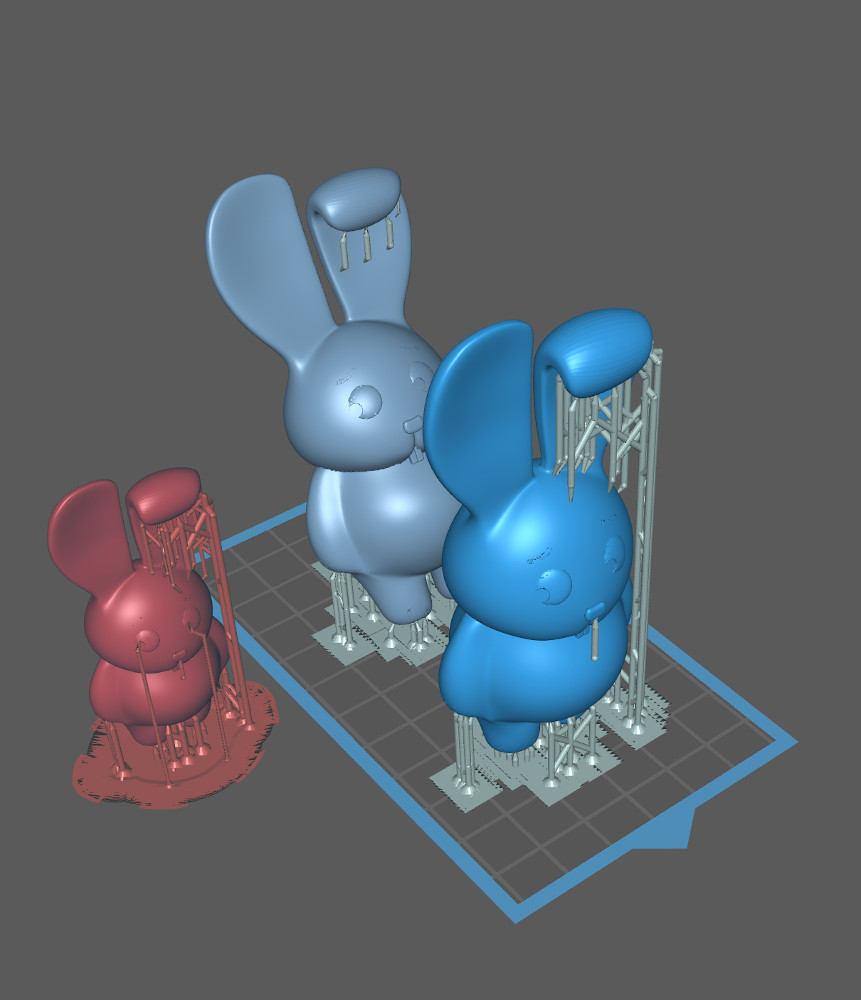
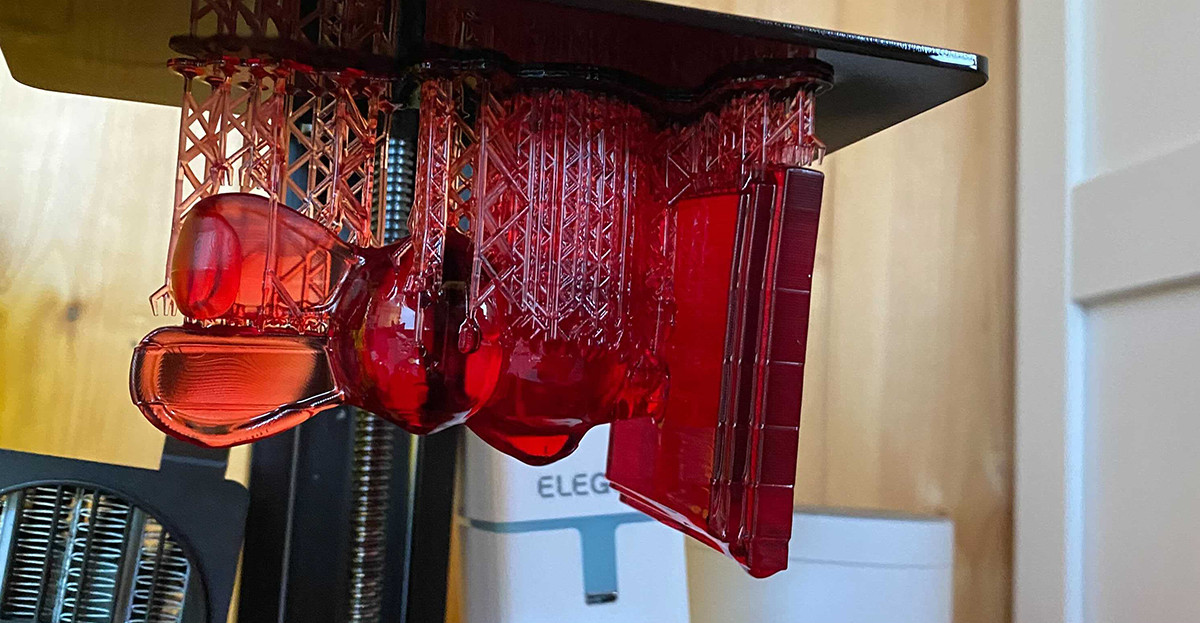
Now the real kicker with 3D printing is the in-ability to print anything with angles of more than 40 degrees without supports. This is because 3D printing happens in reverse and the overhanging parts are not strong enough to support themselves and thus they fail. We ran the bunny object model through some freeware software which automatically adds these struts/supports but the result wasn't great.
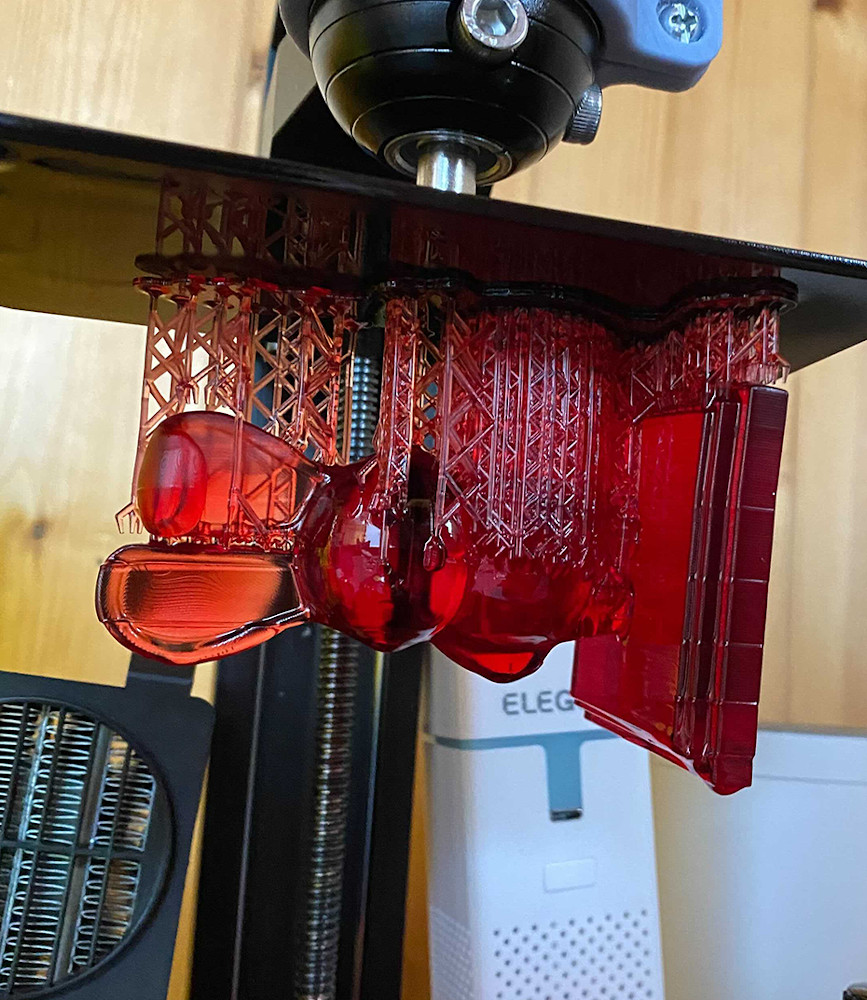
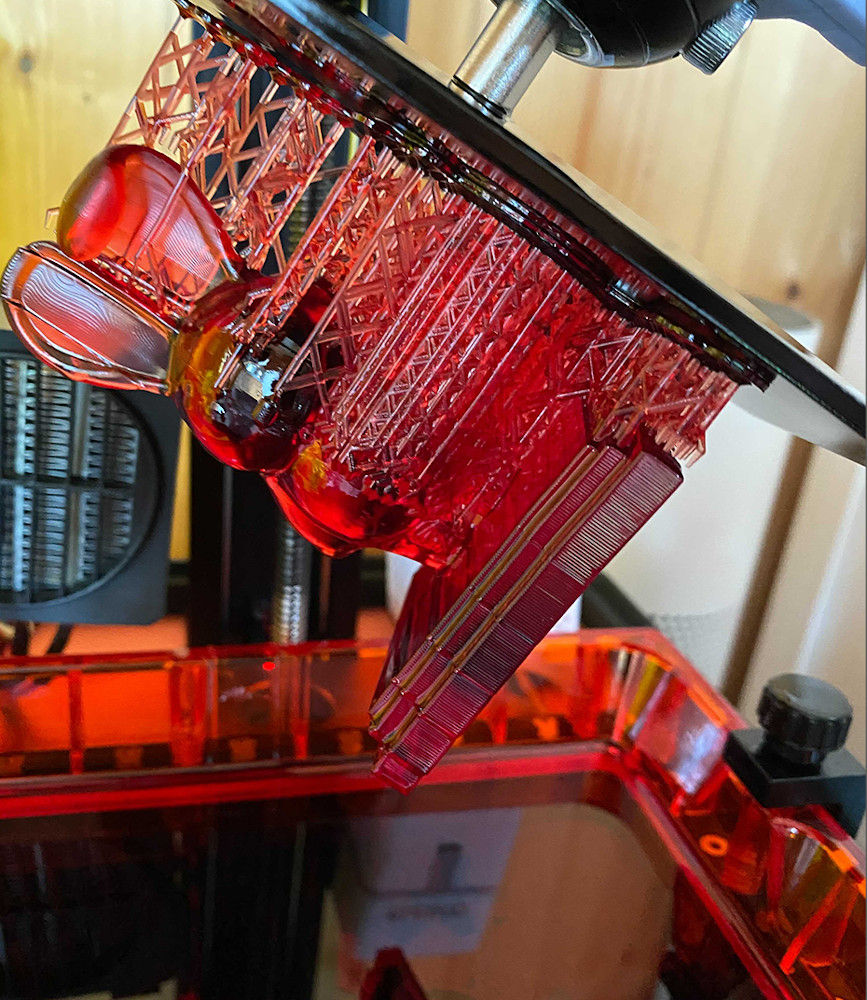
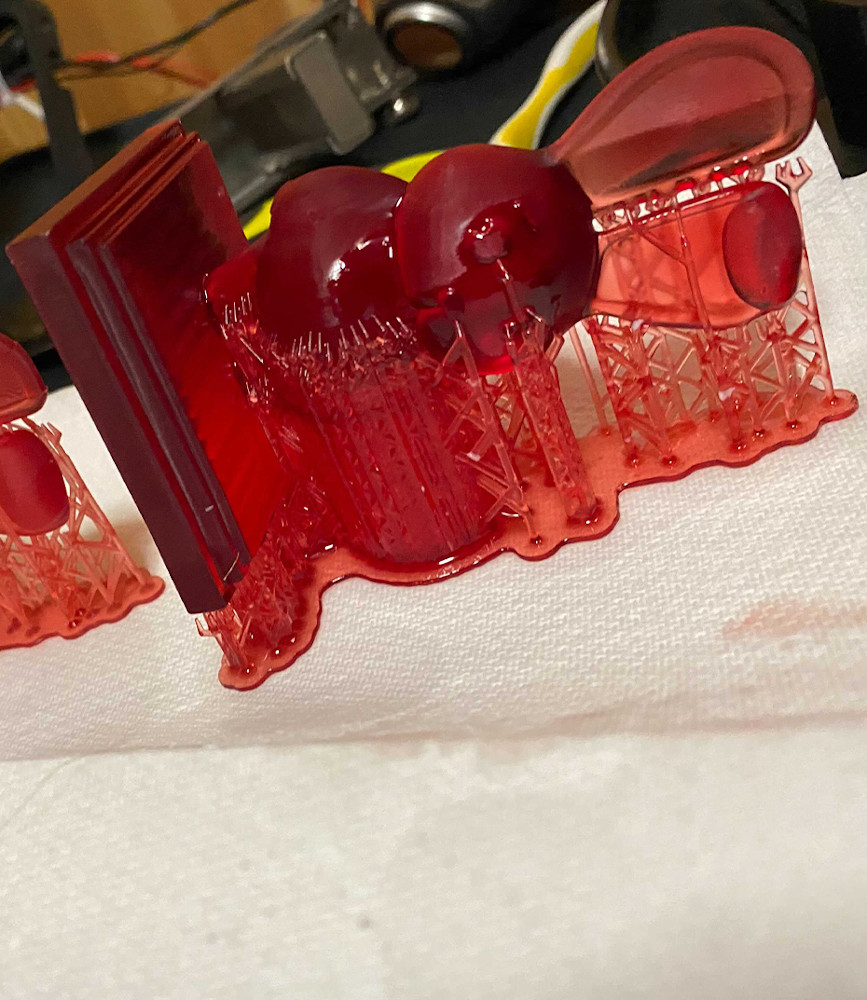
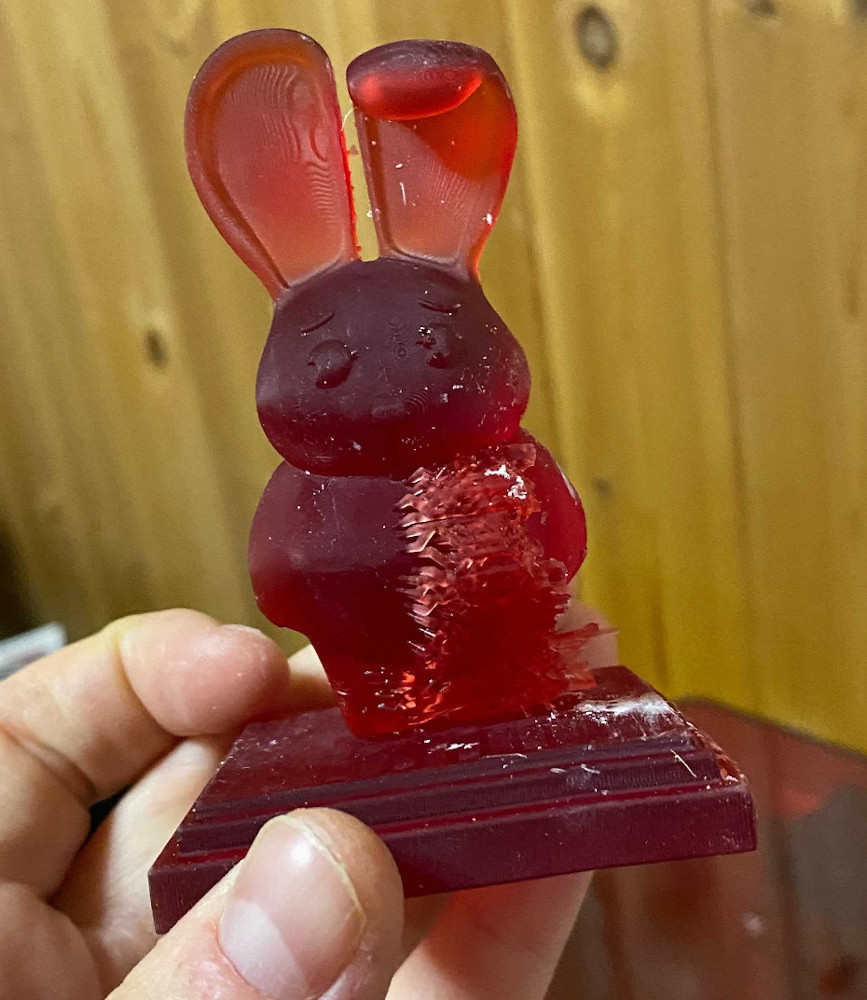
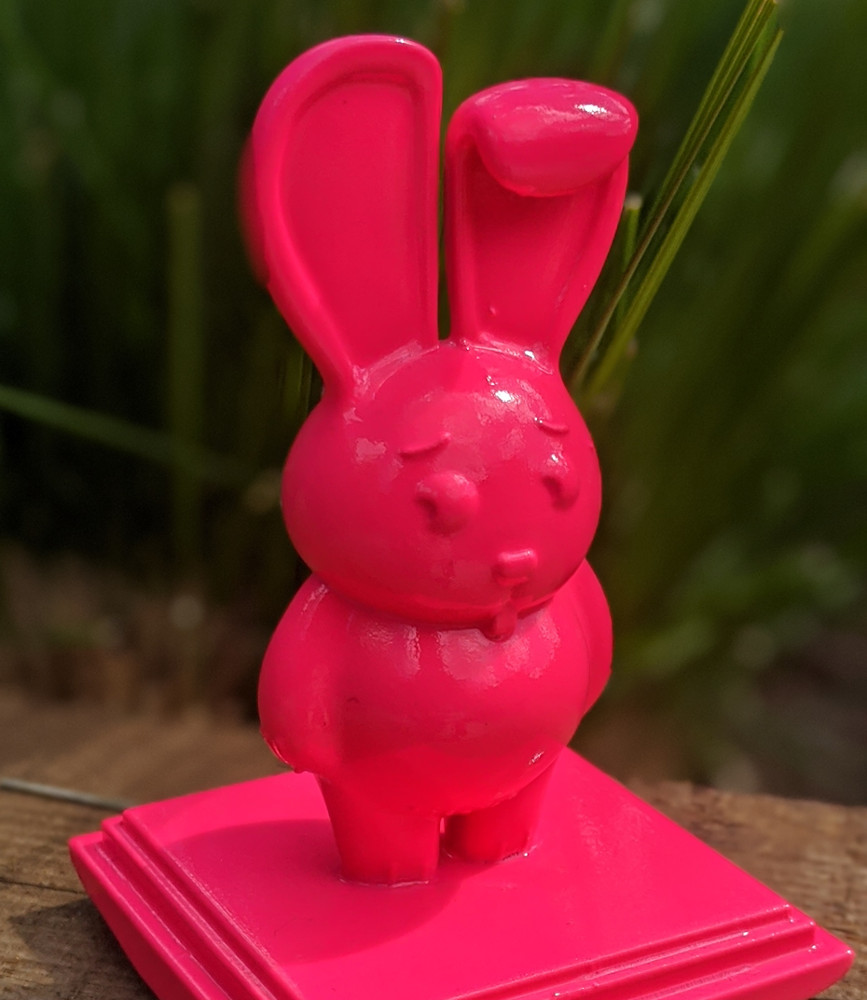
Several versions and mis-prints later (frustrating when each print is an overnight affair) we had modified the 3D model and added custom supports. Finally it was onto finishing, which, it turns out is ALOT of sanding, like ALOT. After wearing out hands to just little nubs we had a solid result that sparkles in the light and looks great. The solid grey prints were much easier and were finished in the traditional car bodywork process with blocker, primer, paint and final lacquer.
If you have any questions regarding the process then we’d be happy to chat, you can message us on Discord here.